
 Esperanto
 Shqiptare
 Euskara
 Zulu
Zulu
 Latinus
 Cymraeg
 தமிழ்
தமிழ்
 Slovak
 Slovak
 Afrikaans


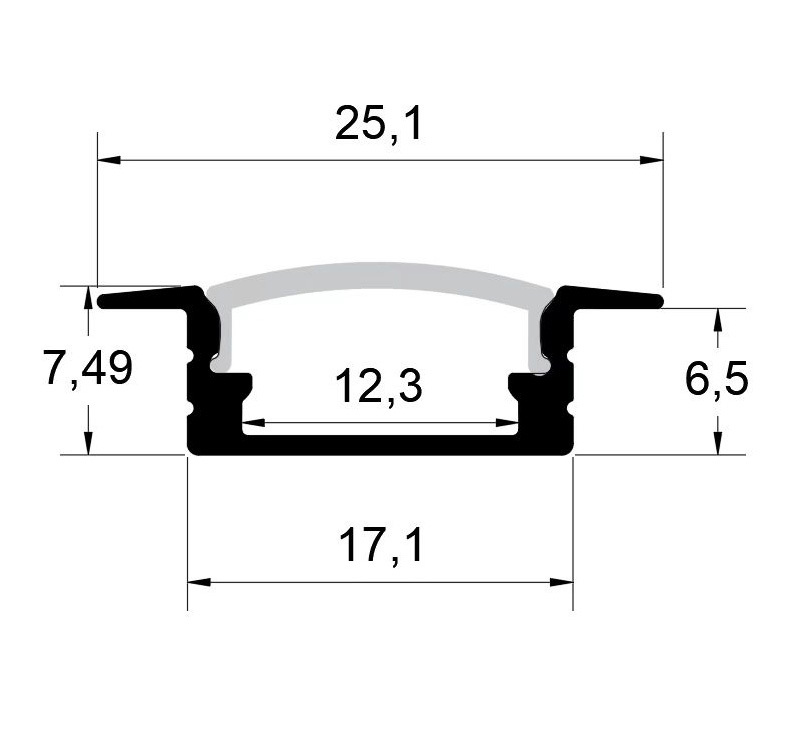
R2508 25*8mm Aluminum LED Profile
R2508 25*8mm Aluminum LED Profile
Category:
Recessed Series
Key words:
Recessed Series
-
- Commodity name: R2508 25*8mm Aluminum LED Profile
Specification Material 6063 Aluminum Alloy & PC Item No. R2508 IP Rating IP20 Finish Anodized Silver, Power Coated Black / White / Blue Section Size W 25mm x H 8mm Match LED Strip up to 12mm Width PC Diffuser Mikly , Clear Length 1m , 2m , 3m (customized length is available) Accessories Plastic End Caps , Plastic or Metal Clips OEM & ODM Available Accessories
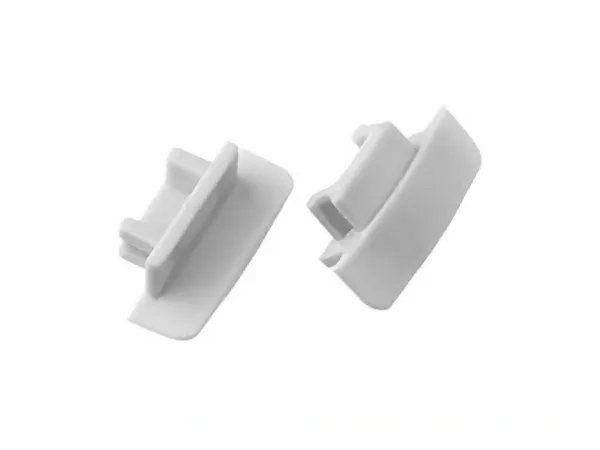
End Caps
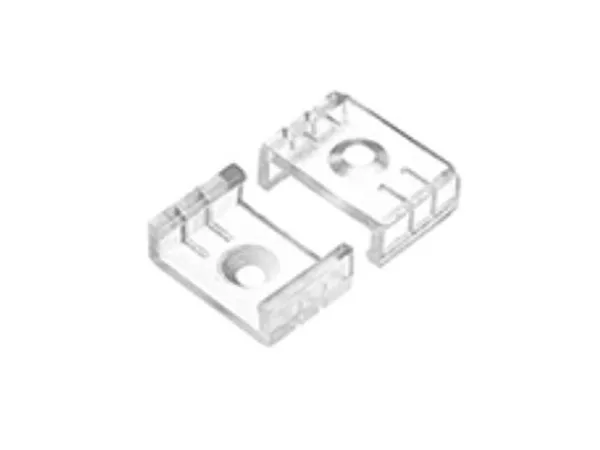
Plastic Mounting Clips
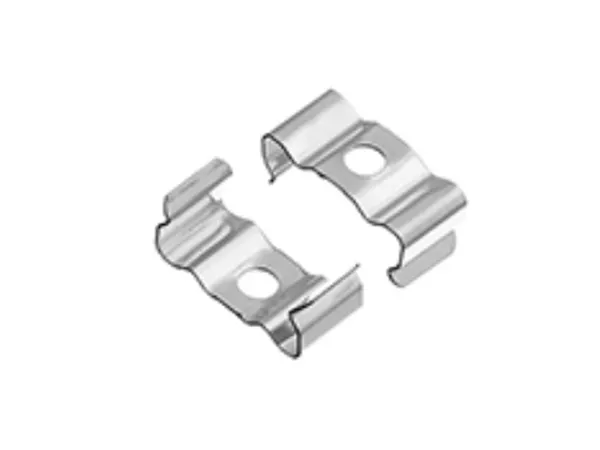
Metal Mounting Clips
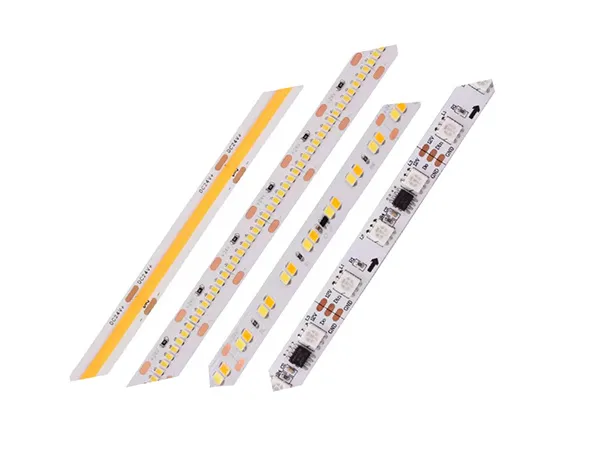
LED Flexible Strips

LED Rigid light bar
-

-
To install recessed LED aluminum channel extrusion, please follow these steps:
Prepare the necessary and materials: You will need the recessed LED aluminum channelusion, LED strip lights, a pencil or marker, a saw or cutting tool suitable for aluminum, mounting clips or brackets, screws, a screwdriver or drill, and any additional accessories specific
Determine the installation location: Decide where you want to recess the aluminum channel extrusion. It can be on a, ceiling, or other suitable surfaces. Ensure that location is suitable for the desired lighting effect.
Mark the installation points and cut channel: Use a pencil or marker to mark the desired length of the aluminum channel on the or ceiling. Carefully cut the channel according to the marked lines a saw or cutting tool suitable for aluminum. Ensure a clean and precise cut.
Install the mounting clips: Attach the mounting clips or brackets to the marked locations on the wall or ceiling. Use screws and a screwdriver or drill to secure them in place. Ensure that they are aligned and evenly spaced to provide stable support for the aluminum channel.
Insert the LED strip lights into channel: Place the LED strip lights into the recessed part of the aluminum channel, aligning them properly. Ensure that the (+) and negative (-) terminals of the strip lights are correctly connected to the or terminals within the channel.
Secure the channel in place: Carefully insert the aluminum channel into the recessed area aligning it with the mounting clips brackets. Use screws and adriver or drill to secure the in place. Ensure a firm and stable installation.
Connect the LED strip lights: Depending on design of the aluminum channel, the manufacturer’s instructions to properly connect the LED strip lights to the connectors or terminals within the channel. Ensure proper electrical connections and wiring.
Test the lighting: Before completing installation, turn on the LED strip lights to verify that they are functioning properly. Make any necessary adjustments or fixes if needed.
Please note that the specific process may vary depending on the and model of the recessed LED aluminum channel extrusion. refer to the manufacturer’s instructions and guidelines for the most accurate and up-to-date installation procedures. you are unsure or need assistance, it is recommended to consult professional electrician or lighting specialist for installation support.
-

-
- Description
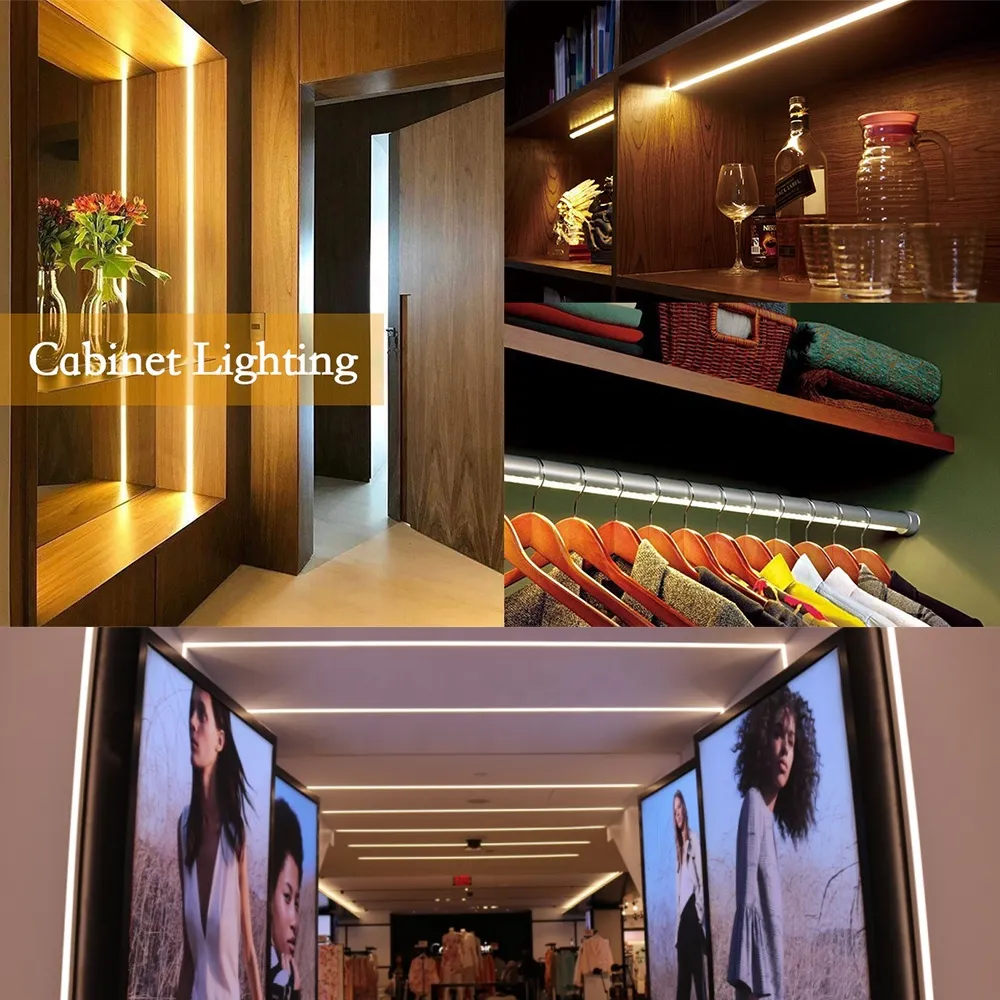
- Lighting
- Installation
- Application
-
Specification Material 6063 Aluminum Alloy & PC Item No. R2508 IP Rating IP20 Finish Anodized Silver, Power Coated Black / White / Blue Section Size W 25mm x H 8mm Match LED Strip up to 12mm Width PC Diffuser Mikly , Clear Length 1m , 2m , 3m (customized length is available) Accessories Plastic End Caps , Plastic or Metal Clips OEM & ODM Available Accessories
End Caps
Plastic Mounting Clips
Metal Mounting Clips
LED Flexible Strips
LED Rigid light bar
-
-
To install recessed LED aluminum channel extrusion, please follow these steps:
Prepare the necessary and materials: You will need the recessed LED aluminum channelusion, LED strip lights, a pencil or marker, a saw or cutting tool suitable for aluminum, mounting clips or brackets, screws, a screwdriver or drill, and any additional accessories specific
Determine the installation location: Decide where you want to recess the aluminum channel extrusion. It can be on a, ceiling, or other suitable surfaces. Ensure that location is suitable for the desired lighting effect.
Mark the installation points and cut channel: Use a pencil or marker to mark the desired length of the aluminum channel on the or ceiling. Carefully cut the channel according to the marked lines a saw or cutting tool suitable for aluminum. Ensure a clean and precise cut.
Install the mounting clips: Attach the mounting clips or brackets to the marked locations on the wall or ceiling. Use screws and a screwdriver or drill to secure them in place. Ensure that they are aligned and evenly spaced to provide stable support for the aluminum channel.
Insert the LED strip lights into channel: Place the LED strip lights into the recessed part of the aluminum channel, aligning them properly. Ensure that the (+) and negative (-) terminals of the strip lights are correctly connected to the or terminals within the channel.
Secure the channel in place: Carefully insert the aluminum channel into the recessed area aligning it with the mounting clips brackets. Use screws and adriver or drill to secure the in place. Ensure a firm and stable installation.
Connect the LED strip lights: Depending on design of the aluminum channel, the manufacturer’s instructions to properly connect the LED strip lights to the connectors or terminals within the channel. Ensure proper electrical connections and wiring.
Test the lighting: Before completing installation, turn on the LED strip lights to verify that they are functioning properly. Make any necessary adjustments or fixes if needed.
Please note that the specific process may vary depending on the and model of the recessed LED aluminum channel extrusion. refer to the manufacturer’s instructions and guidelines for the most accurate and up-to-date installation procedures. you are unsure or need assistance, it is recommended to consult professional electrician or lighting specialist for installation support.
-
-
Prev
Related products
Providing you with high-quality LED profiles suitable for various installation methods.


Recent news


Contact us

Add:6F,1 BLK,SanYu T-Park, NO.4 IND, XinWei, XinZhuang, MaTian ST, GuangMing DIST, ShenZhen 518106 CN


